Sunday 24 February 2013

WEEK FIVE also

Bismillahirrahmanirrahim.

Continued from the last post. I will write about how to burn the source code into the microprocessor.

Choose PICKit. But, before that the UIC00B and the PICKit development must be connected to the laptop and to the adapter.

chose PICKit *in the circle

 Then, this image will appear if the device are connected correctly.


To import (.hex) file, follow steps below. First, select the Check Communication from the Tools taskbar. 


When it's ready, then Import Hex from File at taskbar. 


After that, find (.hex) file from target folder. 


The (.hex) file successfully imported when figure below is shown. Lastly, click Write to burn the source code into the microprocessor. The program is then can be erase by clicking the button Erase. 


Barakallah.


Saturday 23 February 2013

WEEK FIVE


Bismillahirrahmanirrahim.

This week's post is about the PicKit and the MPLABs' software. Both of the software were for microprocessor programming. PicKit is used to create the source code or coding for the program and change the (.c) code to (.hex) code while MPLAB is used to burn the program to the IC. 

Here are step-by-step to do the programming:

choose the MPLAB IDE

this preview will show after that
 
At the toolbar, choose Project then Project Wizard to start build our project.

choose Project Wizard from Project

this preview will show

choose PIC16F877A

Then, click 'NEXT' until picture below shown. "Browse" to locate the folder that we want to save. 

"Browse" to locate folder to save 

save in 'testing' folder

Name the project in the destination folder.

name the project

Click 'NEXT' until see the picture below. Then, click 'FINISH'. 

finish of creating the destination folder

Finished creating the destination path for saving the program, the source code is added. For this post, the source code is downloaded at PIC16F Sample Source Code. The source code is in (.c). Else, the source code can be build. Click 'File' and then click 'New'. After save the source code, add the source code and start build it. 

source code added

 The source code is then opened. The picture below show the added source code.

the source code in the biggest column
The source code is the rebuilt by using the compiler to change from (.c) code to (.hex) code. The red button is then clicked. 

rebuilt the code with compiler 

If the source code is correct, the program is built. The 'Build Successful' is then shown in the 'Output' column. If not, the code must be repaired and must be compiled again until it is successfully build.

built success

End of the tutorial for build the source code. Then, the source code is burned in the microprocessor to see the result.


To be continued in the next post! :)

Barakallah.


Friday 8 February 2013

WEEK FOUR

Bismillahirrahmanirrahim.

As in week four, my supervisor had asked me to buy some device to program the microcontroller. I bought all of this online with the help of a friend. All of these items costs about RM 140.

The device needed were PIC DEVELOPMENT KIT from CYTRON.

http://cytron.com.my/viewProduct.php?pcode=SK40C&name=Enhanced%2040%20pins%20PIC%20Start-Up%20Kit
Enhanced 40 pins PIC Start-Up Kit

Enhanced 40 pins PIC Start-Up Kit with UIC00B

USB ICSP PIC Programmer V2010

IC PIC16F877A

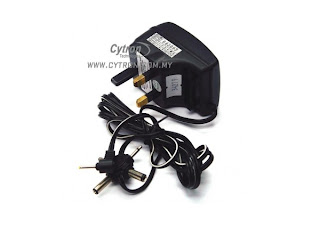
Adapter Teletron TMC-500PM

pin configuration of IC PIC 16F877A

You can click the link on the numbered list above to go to the link. For next week, I will learn how to program the microcontroller. Hope I can do the programming!

Barakallah.


Saturday 2 February 2013

WEEK THREE

Bismillahirrahmanirrahim.

In this post, I will show the circuit diagram that I may used for my EOG circuit. I got this circuit in a website which use eyes for their experiment. This is the link to the website. 

EOG circuit diagram

There are also the electric wheelchair project controlled by the EOG circuit. (click here) 

Barakallah.